
I have been using Photoshop since version 2, back in the mid-90s, and before that I had been working in my darkroom since I was 13 years old. I have told so many people that for me, I think I really fell in love with photography after working in the darkroom as I loved watching my images come to life and I loved having the ability to manipulate them in different ways. Photoshop really changed everything for so many people and there are countless ways to enhance your images and the end result is if you do a good job with your post processing, it will do nothing but make you look like a better photographer. But for me, the secret to Photoshop is that you really don’t want to make it look like you used Photoshop! That might sound strange but how many times have you looked at an image and immediately known that some kind of post processing was done. Sometimes that can be okay as that might be what the photographer is going for, but most of the time, especially with portraits, you want to enhance the image and give it a believability and a look, but you hopefully want it to look like you are a great photographer…. and not just a great Photoshop artist.

I am featured in a new book called Adobe Master Class Photoshop that was put together by one of my very good friends and fellow instructor Ibarionex Parello, and it is a book showing artwork and tutorials from established and emerging artists and a pretty slick little book. I decided to do my tutorial on blend modes for portraits as I have loved using blend modes for as long as I can remember in so many different kinds of situations. You can use blend modes for almost anything but one thing I love using them for aside from portraits are many of my travel images as my stock agencies love the unique look that blend modes can have on your images. I want to explain in this tutorial how blend modes work and how easily you can work with them to totally transform so many different kinds of images. They can be subtle little changes to your image or incredibly powerful and dramatic changes but they are a part of Photoshop that has been around forever and extremely easy to work with as long as you’re comfortable working with layers. Blend modes are really just one layer’s interaction with another layer and actually lots of fun to play with and can create a ton of different beautiful looks for your photos.
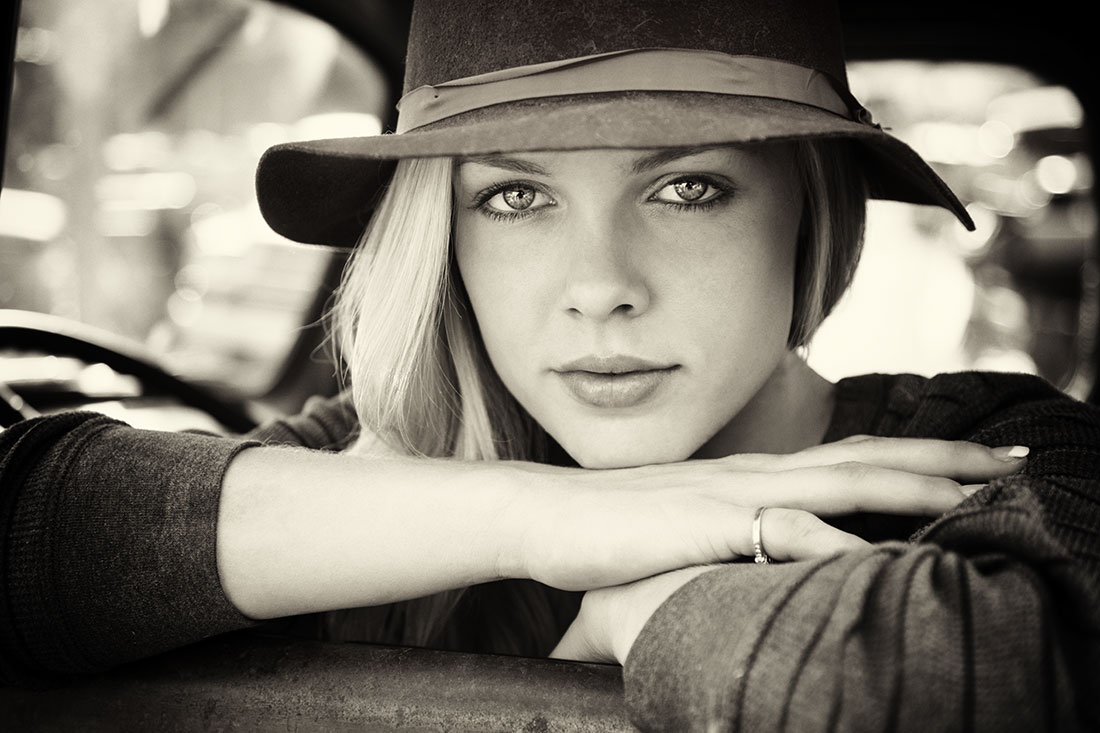
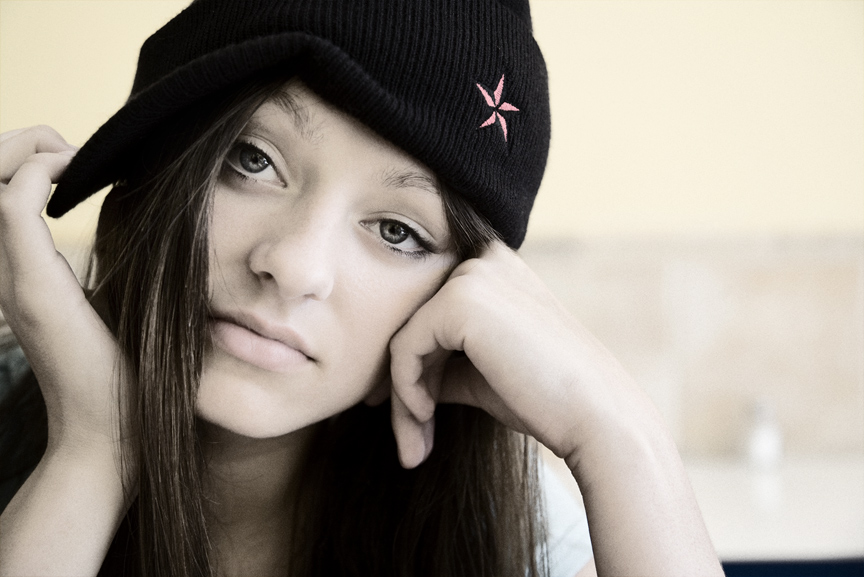
The image above is my friend Tiffany, who I shot yesterday at a very cool junkyard in the town of Jerome, near where I live in Sedona. It’s an amazing rustic setting with a million old cars and trucks an old dilapidated machinery and I knew would be a great location for some portraits of her and would lend itself perfectly to HDR and also blend modes. I love great locations and this is absolutely off the scale for photography and I will be doing a travel and portrait workshop in this location in June for the Sedona Photo Fest and just love shooting up there whenever I can. While we were there, I put Tiffany in a super old beat up car and have her leaning on the driver side door looking at me. I had my fiancé Holly holding a soft gold reflector to camera left as the sun was behind Tiffany and she was in pretty deep open shade.

In the original image above, I started with very little post processing but I think it looks pretty good for the most part. It’s actually fine the way it is as the lighting works great all across her face and clothes but I wanted to try to make it a little bit more dramatic with a little bit more flair. One of the things that I love to do when I am trying to make a portrait a little bit different is to first convert it to black and white or sepia before I use my blend modes. I discovered this so long ago as I love experimenting in Photoshop whenever I can and converting to black and white has always been one of my favorite things to play around with in Photoshop. Afterwards, adding blend modes to black-and-white or sepia images can be one of the best ways in the world to make your original color images have so much more drama and impact. It’s easily done and for this particular image, the first thing I did was use Nik Silver Efex Pro on this image of Tiffany and you can see the conversion that I did in the image below. It actually looks pretty sweet the way it is as a sepia toned black-and-white and I could keep it just like this also as it holds its own just like this.
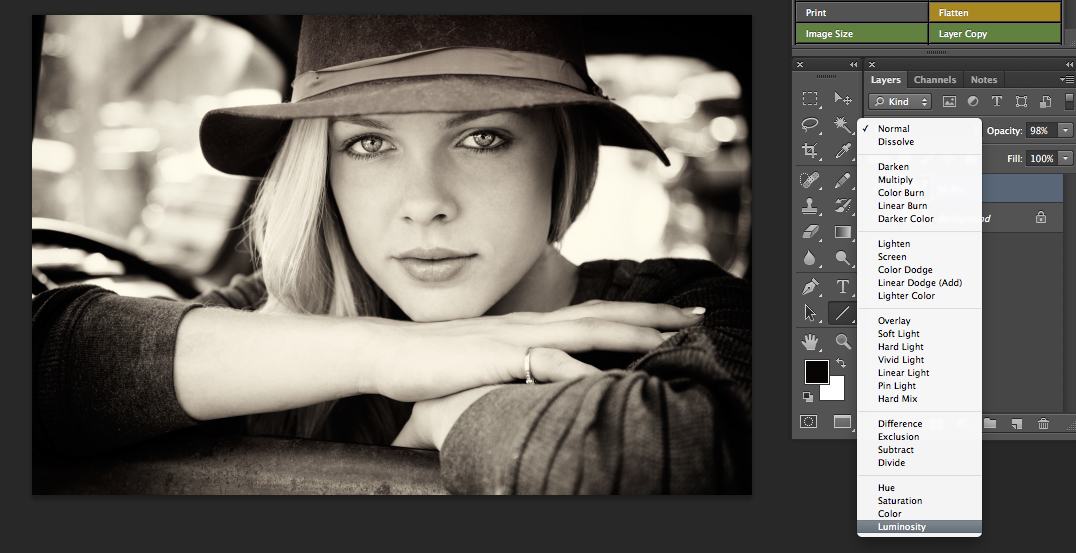
When you first convert an image to black and white or sepia, it really makes a great first step if you’re thinking about using blend modes as the interaction of the colors from your original image take on a whole different feeling with the layers working with each other as your choosing your blend modes. After you have converted to black and white and have it on a separate layer above your original layer, now you can start playing with your blend modes. In the following snapshot, you can see where my blend modes are. The white arrow is pointing to where your blend modes are and since I have not changed it, it still says the word normal.

I want to now start to play with my blend modes. I just mouse click on the word normal and it opens up my list of blend modes where I can choose through so many options. I can instantly see the results and how the black and white layer interacted with my color layer to give me a completely different color image. You can choose to these manually one by one or you can use a shortcut by holding down the shift and + or – key to go through them quickly and see the results one by one very fast. I have some favorite blend modes for so many different kinds of images but for faces luminosity much of the time is my favorite and you can see it highlighted below in the fly out menu.
In the image below, by choosing luminosity, it brought back my color image but did it in a way that the colors look a little more pastel but also vibrant in certain areas but it also gave a little bit of an old-fashioned look or a hand tinted look and that’s exactly what I was going for. Sometimes, especially using Luminosity, faces can go too pink so you might need to use a layer mask to take out a little bit of the pink as it can be too pastel looking at times. When you are done, you have an image that looks softer and more unique but not vastly different. Often, it’s the little changes that can make a big difference in your images!

That’s all that it took and it’s really incredibly simple to go from color to black and white and then back to color and create a completely different look and feel. You can also play with the opacity of your blend modes to feather the look to your taste and dialing exactly the amount of change that you want. You can also leave it much more towards the black and white or the sepia setting and bring back in just a little bit of color and not use any blend mode whatsoever and only change the opacity of the black and white layer. By letting back in a little bit of color, you can get a beautiful hand tinted look also which is something that I have been doing since Photoshop introduced layers back in version 2.5. and I will show an example of this at the end. That’s all there is to it really and it is a huge difference for so many different kinds of images but also so many things can vary depending on which blend mode you choose or opacity of your layers.
The image below of the little monk boy shows again where I used blend modes to change the color image to a different mood, similar to the image of the girl above. It’s really incredibly easy to do and the sky’s the limit when you’re talking about using a part of Photoshop that has so many built-in variations to give you all kinds of different looks. Most of the blend modes available I do not use as so many are incredibly strong and I prefer the more soft and subtle changes that some of them give. Playing around and seeing what you like the best is really the key. But like I said, I don’t just use them for portraits as the sky is the limit for blend modes and all kinds of images!

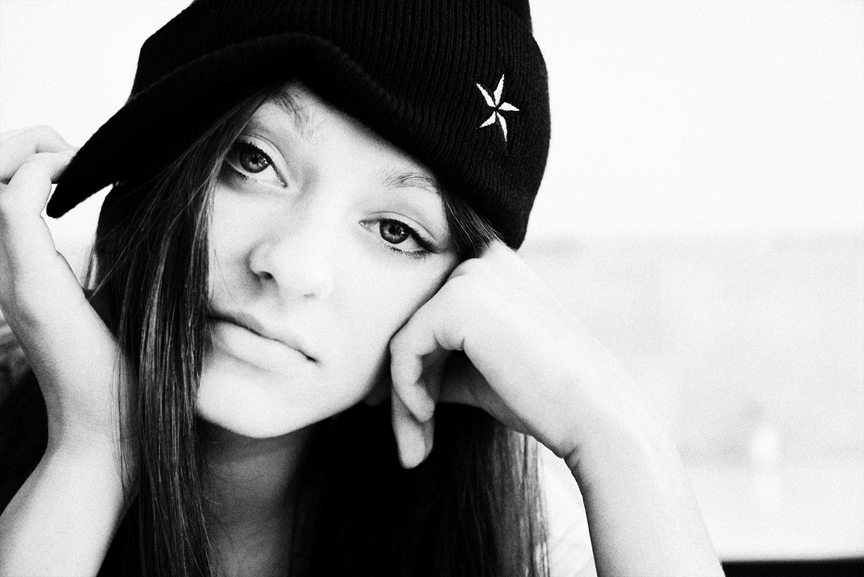
I also mentioned about using your layers opacity as an option if you don’t want to use blend modes and you can achieve some beautiful looks with your portraits by converting them first to black and white. All you have to do is first convert your image to a nice black and white or sepia on a separate layer and then play with your opacity of that particular layer to give you a beautiful and different look that many times can simulate a hand tinted photograph. In the image below of Ashley, I shot her indoors in my favorite pizza shop in Los Angeles but the lighting was not too great but I had a nice image of her to start with.

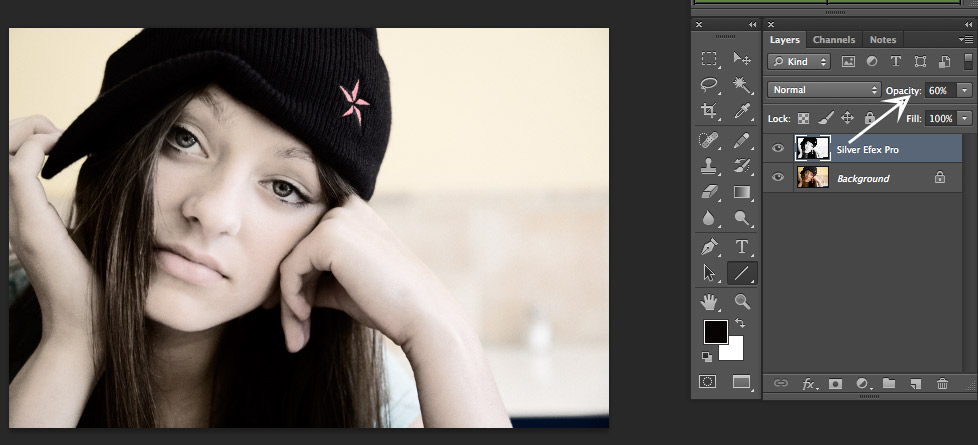
My next step was to convert Ashley to black and white and again and in the image below, I used Nik Silver Efex Pro and came out with a contrasty black-and-white with little gray tones that I thought would make a beautiful transition once I played with the opacity slider of the black and white layer. When you play around with this enough, you start to get an idea of what kind of looks will go in the direction that you are hoping for but truthfully, the sky’s the limit. Playing with all of it with all kinds of different images and settings can give you an infinite number of looks. I thought that this contrasty black-and-white conversion was just what I needed.
The screenshot below shows my black and white layer and instead of changing the blend mode to a different one, I left it at normal and all I did was change the opacity of the black and white layer to approximately 60%. The opacity slider is so incredibly important and it’s really what you can use to design the look and feel of your own image when you want to do something like this. There are are so many variations that you can achieve by even just a small amount of tweaking and the opacity slider is a part of Photoshop that I use all the time!
The image below shows what I achieved by first converting to black and white and then backing off the black and white to about 60%. Much more soft and intimate but a hand tinted feel and just what I was looking for. Sometimes, a full color image is not what you really want and playing with your blend modes and your opacity settings can make all the difference in the world for your portraits! Quick and easy but pretty cool stuff!!